Configure Modular Input
The TA-opnsense modular input will interact with the OPNsense API using GET requests. This allows for system information to be returned to enrich the already ingested Splunk data. For more information on what data is collected by this modular input see Reference: Modular Input in this documentation.
Overview
- Perform prerequisites
- Create Account
- Create Input
Tested Versions
OPNsense v21.7
Add-on Version 1.4.0
Prerequisites
- Obtain API Credentials.
- FQDN/IP of the OPNsense instance (multiple instances may be setup through the interface).
- (optional) CA Certificate for OPNsense instance.
- Splunk must be able to communicate to the firewall directly through the web port (default 443/tcp) or through a proxy.
Obtain API Credentials
- Log in to the OPNsense web interface.
- Navigate to System > Access > Users.
- Create a new user or edit an existing user.
- Scroll down to the
API keyssection, click the "+" to create new API credentials. This downloads an "apikey.txt" file containing the credentials for the API. These will be used in later steps.
Obtain CA Certificate
Optional
The Certificate Authority (CA) certificate can be used to verify authenticity of the device you are connecting to.
- Log in to the OPNsense web interface.
-
Navigate to System > Trust > Authorities.
Not Seeing any Certificates?
If no certificates show up in this view, this could mean that you are using the default self-signed Web certificate from OPNsense. If this is the case, skip these steps and ensue the "Verify Certificate" checkbox is not checked when setting up the modular input. For better security, it is recommended to create a new certificate for the OPNsense web interface (see OPNsense Documentation for more information).
-
Export the CA cert of the Authority being used for the web interface.
- Place the CA Certificate into
$SPLUNK_HOME/etc/auth. It may be easier to create a new directory to keep this certificate separate (i.e.$SPLUNK_HOME/etc/auth/opnsense_certs).
Create Account
At least one account is needed for the modular input to work.
- Verify Prerequisites have been completed before proceeding.
- Log in to the Splunk web interface.
-
Navigate to the OPNsense Add-on for Splunk > Configuration (Tab).
Not seeing the OPNsense Add-on?
The OPNsense Add-on for Splunk must be set to visible in order to configure the modular input.
- In Splunk web, navigate to the "Manage Apps" view by clicking the gear icon on the Launcher page or click "Manage Apps" from the "Apps" dropdown next to the Splunk logo on the top left of the screen.
- In the app list search for "OPNsense Add-on" and click "Edit properties" on the right side.
- Ensure "Visible" is set to Yes and save.
-
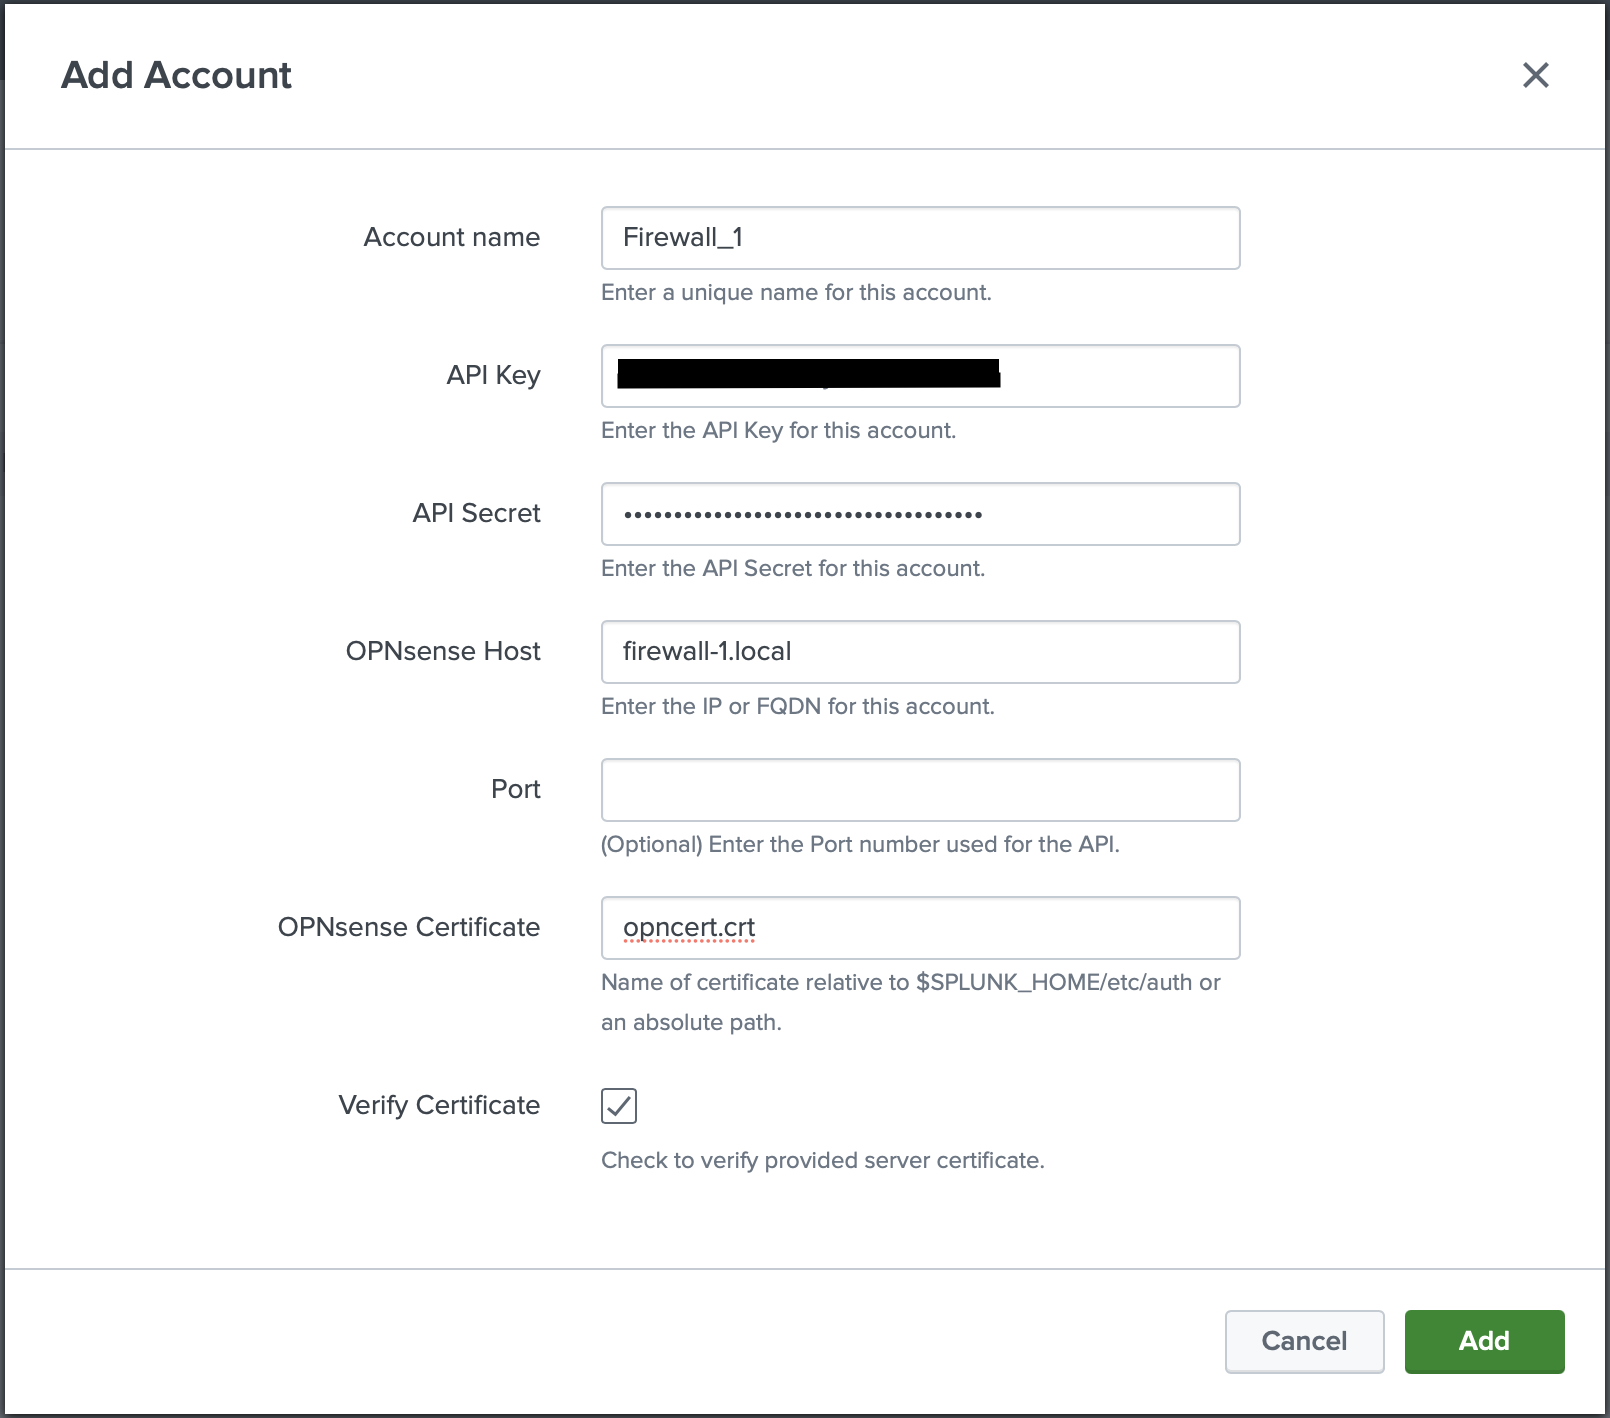
Add a new Account.
- Enter a name for the account.
- Enter the API credentials previously created.
- Enter the IP/FQDN of the OPNsense instance.
- If different from default port of 443, enter the port number being used.
-
(Optional) Enter the certificate path relative to
$SPLUNK_HOME/etc/author as an absolute path.Example
relative path:
opnsense_certs/OPNsense.crtabsolute path:
/opt/splunk/etc/auth/opnsense_certs/OPNsense.crt -
Uncheck the box if you are not using a certificate to verify.
- Click add.
- (optional) Configure proxy.
- (optional) Set logging level.
- Proceed to create an input.
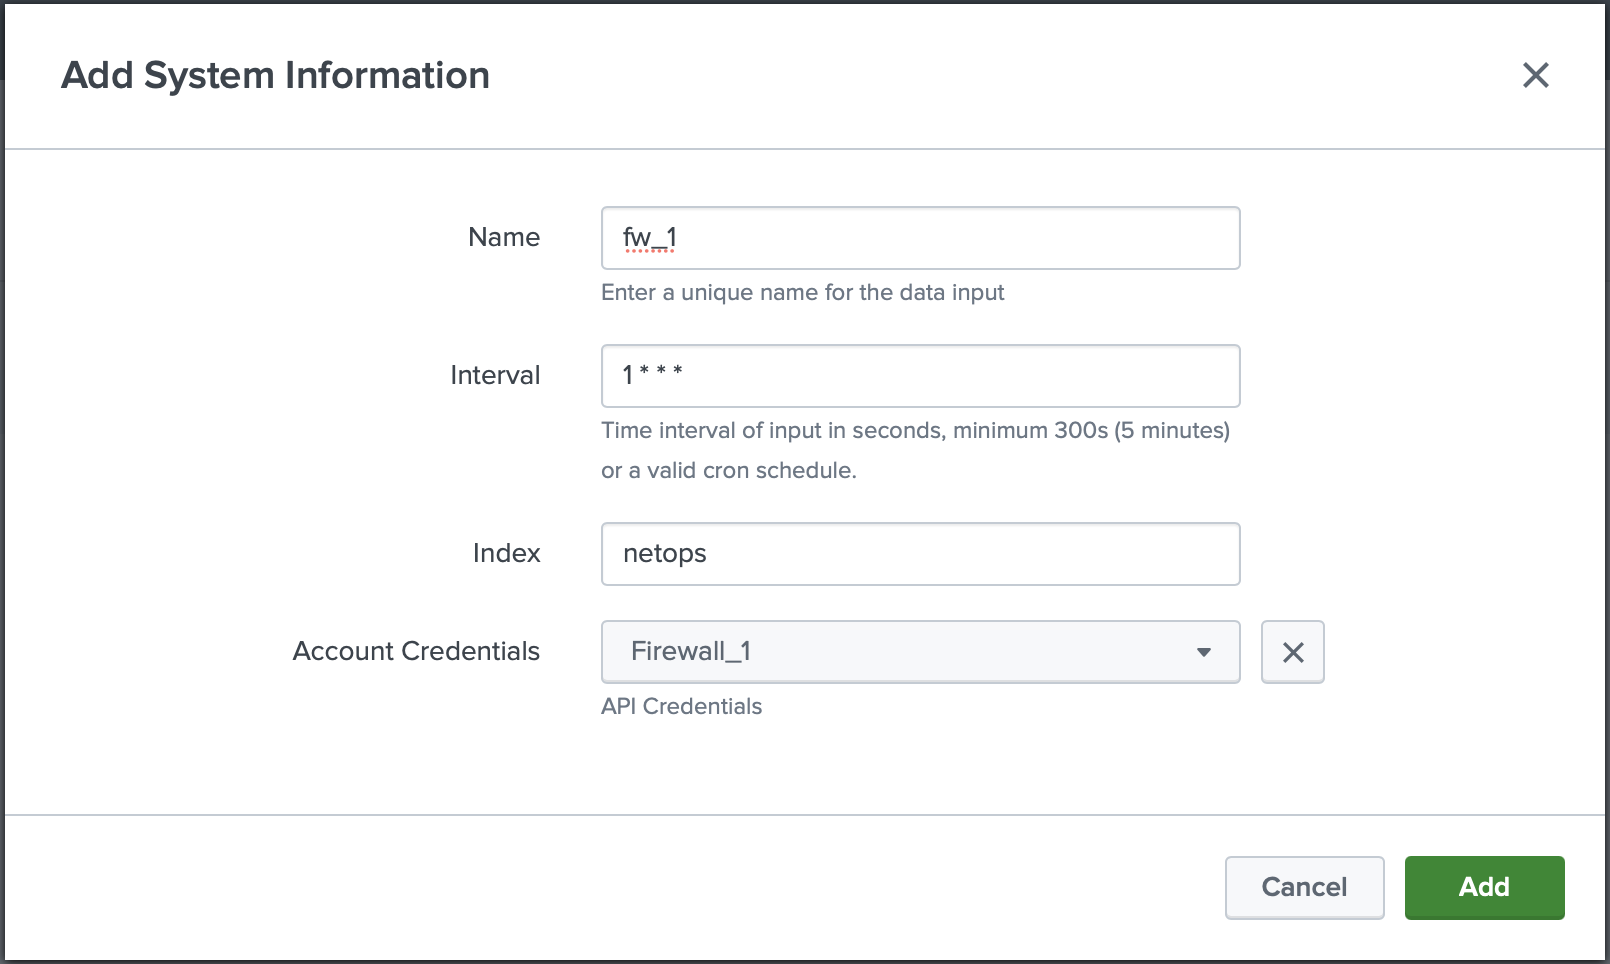
Create Input
- An account is needed before proceeding.
- Navigate to the Input tab.
- Click "Create New Input."
- Enter a unique name.
- Set an interval to run in seconds or a valid cron schedule.
- Select an index.
- Select the correct account credentials for the input.
- Click add.
Verify
Once completed the modular input will immediately run. To verify open up a search and run a similar query:
If data does not appear within a few minutes, see Troubleshooting Modular Inputs.